







Your solar generator got you through the night. The refrigerator stayed on, your phones are charged, and now the battery is getting low. You unfold the solar panels outside, look at the remaining charge, and start wondering whether you can put enough power back before tonight.
That is the part of backup planning I want to make easier for you. Knowing how long a battery lasts is useful. Knowing when you can use that energy again is what helps you plan through a longer outage.
A solar generator can take a couple of hours to recharge from a suitable wall outlet, several hours or multiple days with solar panels, or much longer through a standard vehicle outlet. Your actual time depends on the battery, its starting charge, the charging source, and anything you keep running.
Let’s work out what that means for your household, starting with an actual example and then building a recharge plan you can check for yourself.
How long should you expect charging to take?
A solar generator usually consists of a portable power station and solar panels. Many stations can also recharge from a wall outlet or compatible vehicle connection. The word “solar” does not mean sunlight is the only charging option.
To put some real numbers beside those choices, consider the Jackery Explorer 1000 v2, which has a 1,070Wh battery. Jackery’s published support estimates list these approximate charging times:
| Charging setup | Approximate time |
|---|---|
| AC wall charging | 1.7 hours |
| One SolarSaga 200W panel | 7.5 hours |
| Two SolarSaga 200W panels | 3.8 hours |
| Standard car charging | 12 hours |
These are manufacturer reference figures, not measurements from our own testing. Solar results depend on suitable sunlight and the specified panel setup; they are not a promise that your battery will be full that many clock hours after you put a panel outside. Charging modes and conditions also matter.
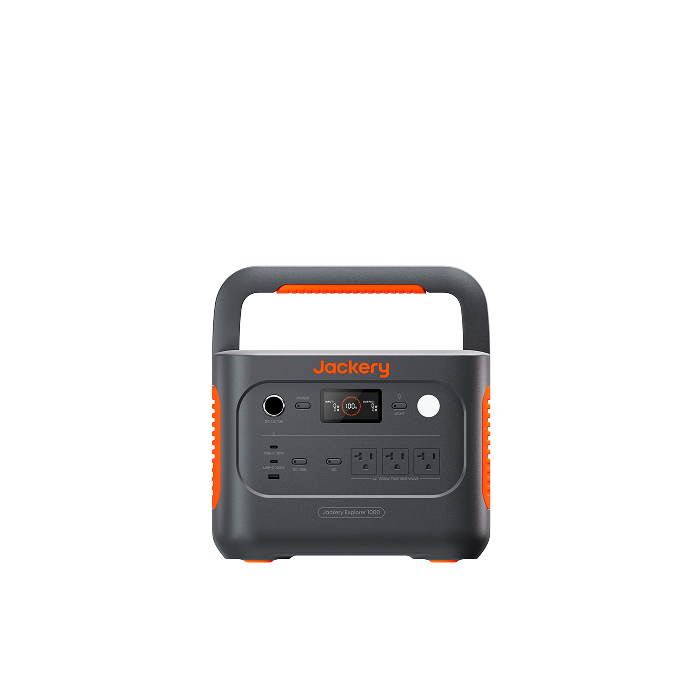
1,070Wh nominal battery capacity.
Compare charging methods for the same model and the same starting and ending percentages.
Here is how I would use that comparison. Before an outage, an available wall outlet gives you a predictable opportunity to recharge. During an outage, solar can replenish energy through the day. A compatible car connection can contribute while you are already driving, but a short trip may only provide a small top-up.
Dedicated alternator chargers are a separate category from a vehicle’s ordinary accessory socket. They need their own compatibility and installation checks; a fast alternator-charging claim does not describe what you will get from a cigarette-lighter cable.
you can actually use.
Start with the charge you actually need
Before comparing charging speeds, look at your battery percentage. Most mornings, you will be topping up a partly charged battery rather than filling an empty one.
Imagine a hypothetical 2,000Wh power station at 20%. You would like to bring it to 80% before evening. That means replacing 60% of its nominal capacity:
2,000Wh × (80% − 20%) = 1,200Wh to add.
Watt-hours, written Wh, describe an amount of energy. For this planning example, 1,200Wh is the amount you want to put back into the battery. The charger must supply more than that because charging has losses.
If the same battery starts at 50%, reaching 80% only requires about 600Wh. The equipment has not become faster; you simply have less energy to replace.
I like beginning here because “How long from empty to full?” can make a perfectly workable recharge plan look impossible. Your household might only need enough additional charge to cover the next evening.
The percentage target should still come from what you need to run. An 80% battery is not automatically enough for every home. Work back from your essential appliances, the hours you need, and a reserve. Our guide to sizing a solar generator for home backup walks through that decision.
These percentage calculations are estimates. Display rounding, battery age, temperature, and the way a station estimates its remaining capacity can affect the result. They give you a sensible starting point to check against the screen as charging progresses.
Check how much power is reaching the battery
Next, find the input reading on the power station. This is usually shown in watts, or W, and tells you how quickly power is entering the unit at that moment.
A panel marked 400W does not guarantee that the screen will show 400W throughout the day. And the station’s large AC output number tells you about powering appliances, not necessarily how quickly it can recharge.
The basic relationship is straightforward:
Estimated charging time = energy you need to add ÷ average power actually stored.
Suppose our 2,000Wh example needs that 1,200Wh top-up. If it averages 300W going into storage after charging losses and any ongoing demand, the estimate is four hours.
At 150W net, the same top-up takes eight hours. At 600W net, it takes two. These are hypothetical steady averages, not ratings for the Jackery above.
The important word is “average.” A brief 600W reading does not mean you will store 600Wh during the next hour. Clouds, charging limits, temperature, and the battery approaching full can all change that rate.
If you only know input power, allow for charging losses. For example, a steady 400W input with an assumed 90% input-to-storage efficiency would add about 360Wh per hour with outputs off. Our 1,200Wh top-up would take roughly 3.3 hours under those unchanged conditions.
That 90% is an illustrative allowance, not a universal efficiency rating. It includes charging overhead for this example. Actual equipment varies, and a calculation based on one screen reading needs checking as conditions change.
You can make the estimate more useful by noting the battery percentage and time, then checking again later. A reasonable observation window shows whether the battery is recovering at the pace your plan needs.
Give solar charging a whole-day plan
Solar charging needs a little more thought because the source changes while you wait. A clear morning, a cloudy afternoon, and a tree shadow crossing your panels can produce very different results with the same equipment.
The Department of Energy explains that heat, dirt, and shade can reduce a panel’s conversion efficiency. The wattage printed on the panel is a reference rating; your location and conditions determine what reaches the station.
This is where “peak sun hours” helps. It expresses a day’s solar energy as an equivalent number of hours at a reference sunlight intensity of 1,000 watts per square meter. The definition appears in this DOE/NREL solar guide. Four peak sun hours can be spread across a much longer daylight period.
For a simple daily estimate, imagine a compatible 400W panel array, four peak sun hours, and a 75% overall allowance from panel rating to stored energy:
400W × 4 peak sun hours × 0.75 = about 1,200Wh stored that day.
That could cover our example’s 20%-to-80% top-up if there are no appliances running and those assumptions hold. The 75% is a planning assumption that combines collection and charging losses, not a measured result for a particular kit.
It is a different estimation method from using actual input watts. Do not apply both loss allowances to the same calculation: the daily method starts with panel nameplate power, while the earlier method starts with power already reaching the station.
Most importantly, four peak sun hours does not mean “start at noon and finish at four.” Starting late misses part of the day’s available sunlight. A recharge needing more solar energy than the remaining afternoon provides will extend into another day.
For a visual example, here is an invented eight-hour charging day. It starts with a 2,000Wh battery at 20%, uses average input readings for each two-hour block, assumes 90% input-to-storage efficiency, and has all outputs off.
charging day add?
Outputs off · 90% input-to-storage efficiency
This illustration is an energy worksheet, not a local weather forecast or a product test. Its input numbers represent power already accepted by the station. The evening result changes if your panels collect less, the charger slows, or you start later.
When choosing an array, use our guide to how many solar panels you need. For days when the forecast looks poor, our cloudy-weather charging guide helps you plan with a smaller energy harvest.
Account for the appliances still running
During a real outage, you may need to keep the refrigerator or other essentials powered while the panels are working. That can be a sensible use of the system, but incoming energy now has more than one job.
Some power supports the loads. What remains can increase the battery’s stored energy. If demand exceeds the available input after losses, the battery can continue dropping even though solar panels are connected.
Let’s return to the illustrated day. With outputs off, the assumed charging profile adds 1,440Wh, bringing the battery from 400Wh to 1,840Wh, or 92%.
Now suppose your appliances create an additional average battery-side demand of 100W for those same eight hours. That is 800Wh used while you charge. Here, “battery-side” includes output conversion losses and any additional overhead from powering those appliances; it is not simply a 100W appliance label.
Under that simplified energy accounting, the battery finishes with 1,040Wh, or 52%, instead of 92%. The solar conditions have stayed the same. The household has used part of the incoming energy as it arrived.
I would not ask you to disconnect an essential appliance just to make a charging percentage look better. I would separate necessary loads from optional ones. Charging extra devices, running a television, or using a high-demand kitchen appliance can be a decision you make after checking your evening reserve.
Confirm that your model supports the charging-and-output combination you need. Wall-powered bypass operation can route power differently from solar charging, so input minus output on the display is not always an exact battery-charge calculation. Our guide to using a solar generator while it charges explains those differences.
Read the fine print on fast charging
When a product advertises a very short charging time, I would check three things before building an outage plan around it: the starting percentage, the ending percentage, and the required charging setup.
“Zero to 80%” and “zero to 100%” describe different jobs. So do standard AC charging, an emergency charging mode, and a supported combination of inputs.
Charging can also slow as the battery approaches full. Jackery’s charging support guidance explains that its control system reduces charging current near the end. You should not assume that the final portion fills at the same speed as the middle.
For the Explorer 1000 v2, the official US manual describes a quieter charging mode that lowers charging power. It also recommends reserving emergency charging for when it is needed rather than regular long-term use.
My practical approach is to use the charging mode suited to the situation. A quieter, slower setting may be perfectly reasonable when you have plenty of time. If you need a faster refill, check the approved mode and source requirements before relying on the advertised figure.
Compare like with like when shopping: the same starting and ending percentages, the same input type, and clearly stated panel quantities. A kit’s fastest solar claim may require panels beyond the bundle you are considering.
Fix slow charging in the right order
If the battery is taking longer than expected, I would work through a few simple checks before buying more equipment.
First, check the source and settings
Confirm that the intended source is connected and the display shows input. Check for a quiet mode, an intentional charge limit, or a warning. A battery that stops at a configured target may be doing exactly what you asked.
For solar, check the entire panel surface for shade and use the panel manufacturer’s positioning and cleaning instructions. Compare several readings rather than judging the setup from a passing cloud.
Then, check the charging limits
A station has limits for input voltage, current, and power. Those limits can apply to individual ports as well as the total. Adding panels only helps when the proposed configuration is compatible.
The Explorer 1000 v2, for example, has a 400W combined solar-input ceiling. Its two ports do not each accept 400W. Follow its documented panel configurations and connector requirements.
Before combining panels, check their open-circuit voltage, including the increase possible in cold conditions, against the station’s maximum. Our series-versus-parallel wiring guide explains why a connector that physically fits does not settle electrical compatibility.
Finally, check temperature and ongoing demand
The Explorer 1000 v2 manual specifies charging between 32°F and 113°F and requires indoor use in a dry, ventilated environment. Put the panels where they can collect sunlight while keeping the station in its permitted environment, with the approved cable arrangement.
For vehicle charging, follow both the vehicle and power-station instructions. Jackery specifies starting the vehicle before charging this model. Check the socket rating and cable requirements rather than assuming every outlet can supply the same power.
If the equipment reports a fault, gets unusually hot, or has damaged connectors, stop and follow its troubleshooting instructions. For a healthy system that is simply recovering slowly, check whether your appliances are consuming most of the incoming energy.
Make sure the battery is ready for tonight
By this point, you can turn the numbers into a household routine.
- Check your starting charge. Write down the percentage and time so you have something to compare later.
- Set an evening target. Base it on the devices you need overnight and the reserve you want to keep.
- Start charging when a suitable source is available. For solar, use the available daylight rather than waiting until the battery is nearly empty.
- Watch the recovery. Check input and battery percentage as sunlight and household demand change.
- Adjust while you still have options. Reduce optional demand or arrange another approved charging source if the battery is falling behind.
A practice run before an outage makes this much easier. You will learn where shade falls, how much energy your essentials use, and whether your charging setup can recover enough for another night.
If refrigerator backup is your main priority, use our refrigerator runtime guide to build the overnight side of that plan. Recharging and runtime belong in the same conversation.
You do not need to watch the display every minute. A few deliberate checks are enough to catch a setup that is not keeping up before sunset removes your easiest opportunity to improve it.
A few charging questions you might still have
Can a 100W panel charge a large solar generator?
It can if the station accepts that panel’s electrical specifications and connection, but a small panel can mean a long refill. For illustration, 100W × four peak sun hours × a 75% overall allowance gives about 300Wh stored per day with outputs off. Replacing 1,200Wh would require roughly four such days. Weather and ongoing use could extend that.
Will adding an expansion battery make charging faster?
Extra storage gives you more energy capacity, but it does not automatically increase charging input. If you double the energy that needs replacing while keeping the same average net charging power, the refill takes roughly twice as long. Check the complete system’s specifications because some expandable designs also change how charging is handled.
Can I charge from a wall outlet and solar at the same time?
Some models support combined charging, but you need explicit approval for that combination and its total limits. Do not simply add two advertised maximum input numbers together. Also remember that wall charging only helps during an outage if you have a working, suitable AC source elsewhere.
Do I need to reach 100% every time?
For immediate backup planning, your target is enough usable energy for the job plus a reserve. Follow the manufacturer’s first-use, storage, and maintenance instructions separately. A partial recharge can be useful without being sufficient for your entire overnight plan.
Choose a setup that can recover between uses
The charging time that matters is the one your household can actually achieve with the sources, sunlight, and equipment you have.
I would start with your evening energy needs, work out what needs replacing, and check whether your charging setup can deliver that while essential devices stay on. That gives you a clearer buying decision than choosing the biggest battery and hoping the panels catch up.
If you want help checking a setup, send us your power-station model, panel models, and what you want to keep running. Include how many hours you need backup and where you plan to charge. We can help you compare the relevant specifications and identify the questions to settle before you buy.


